New features
There are some notable differences from the old platform which are described below.
New Flavors and Local Storage
Flavors is the concept of instance dimensions in OpenStack. Each flavor corresponds to a certain configuration regarding VCPUs, memory and disk space. As of now there is only ephemeral storage in the solution which means that if you need more storage, in an instance, you need to create the instance with a flavor which comes with the needed extra storage. The naming convention for the flavors are on the form:
lb.medium.2d
The flavor name starts with an L. This means that this flavor comes with Local Storage. Local Storage means that the instance will use the storage on the compute node on which the instance is running instead of storage from a central storage solution. In the future both Local Storage and Central Storage will be provided but ss of now there is only support for Local Storage. The second letter can be either “b” or “m”. B stands for a 1:2 relationship between number of VCPUs and gigabyte of memory. Medium means two VCPUs so in this case this means that the instance will have 4 GB of memory. M means that the instance will have a 1:4 relationship so instead the instance would have 8 GB of memory allocated. It is important to note the difference between local storage and central storage.
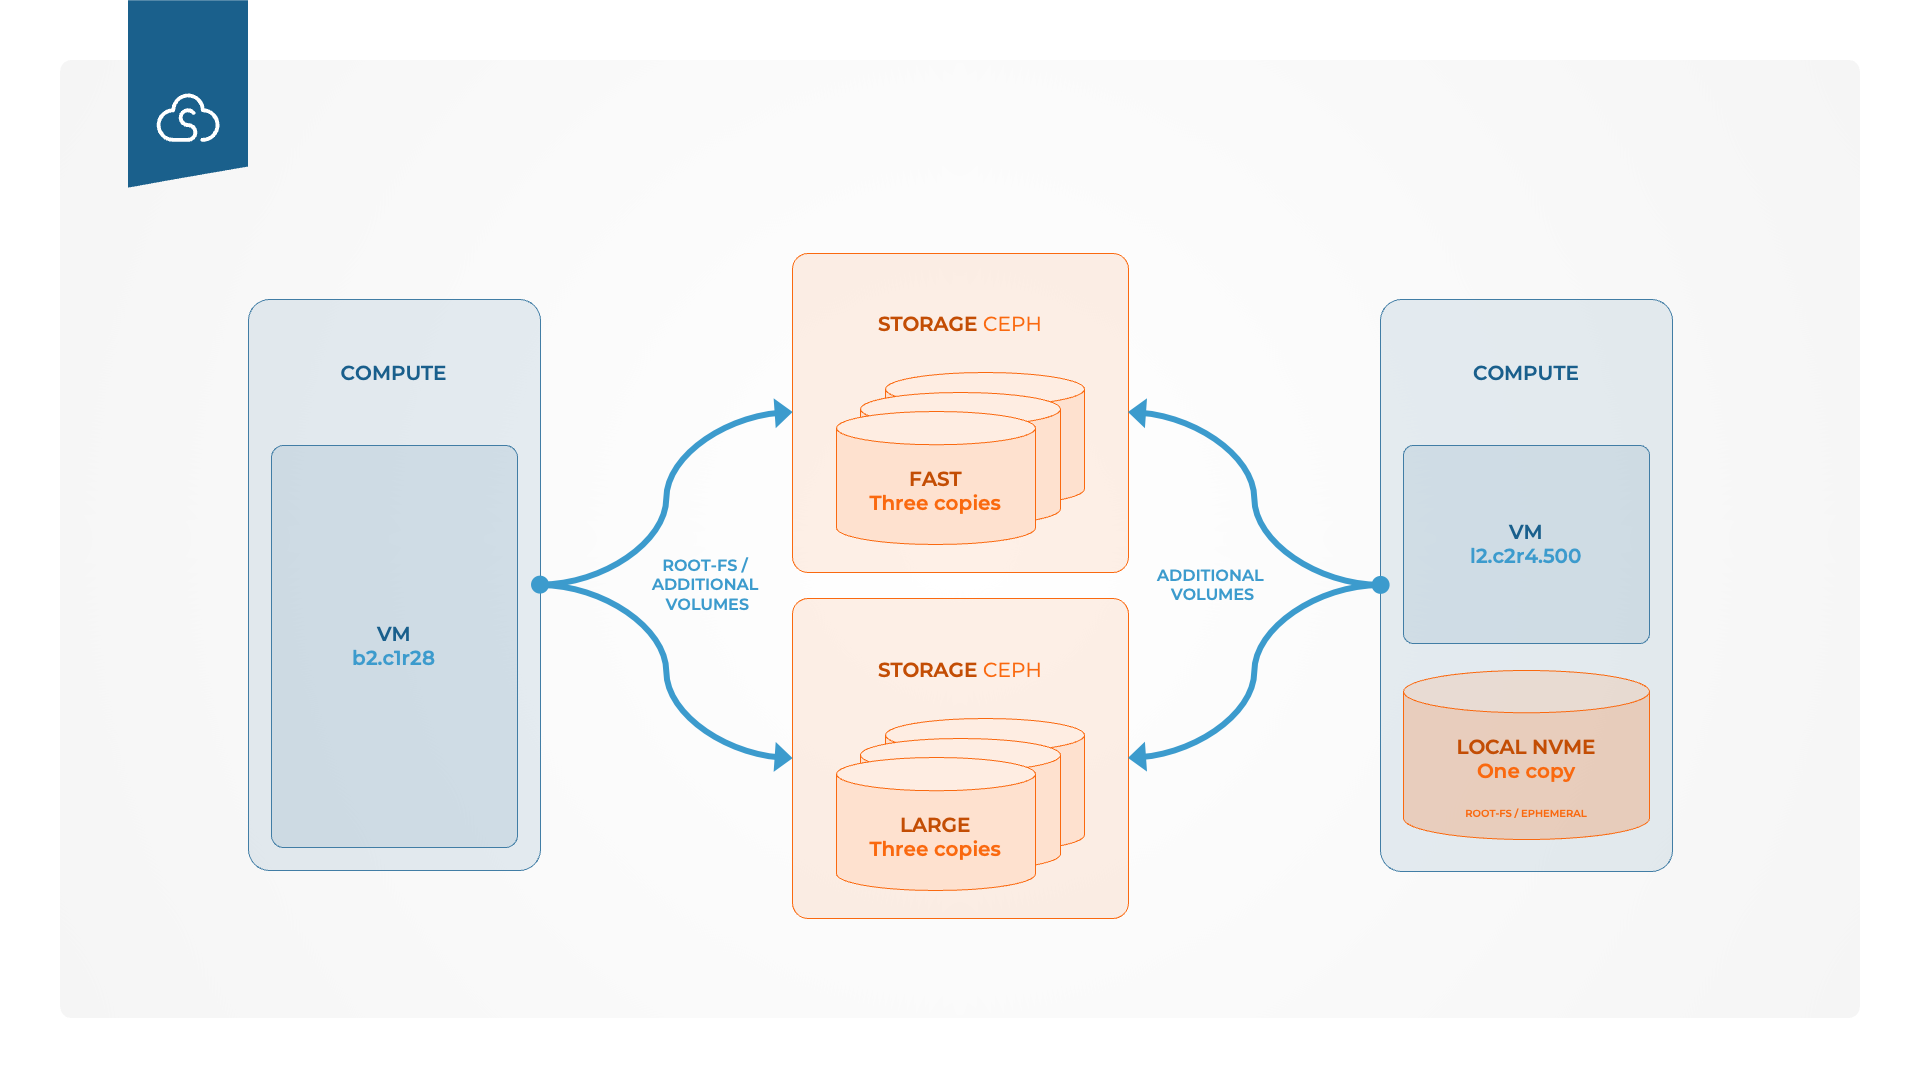
The picture above shows one instance running only with central storage (to the left) and one instance running with local storage on the right. Local storage is using the latest interface NVME which makes it about 7-10 times faster than central storage, FAST, with SSD. The downside is that local storage will only be stored in one copy instead of three which is the case for central storage. This means that if the local hard disk on the compute node where the instance is running crashes the data will be gone. Therefore it is very important to have a working backup solution for all data stored with Local Storage.
Networking
The networking in the new platform is different compared to the old. The old solution used VXLAN-tunnels to set up layer-2 connectivity between the instances but in Calico which is used in the new platform there is no Layer-2 connectivity to the instances but only layer 3 IP connectivity. This has benefits for stability and scalability but comes with some constraints compared to the old solution.
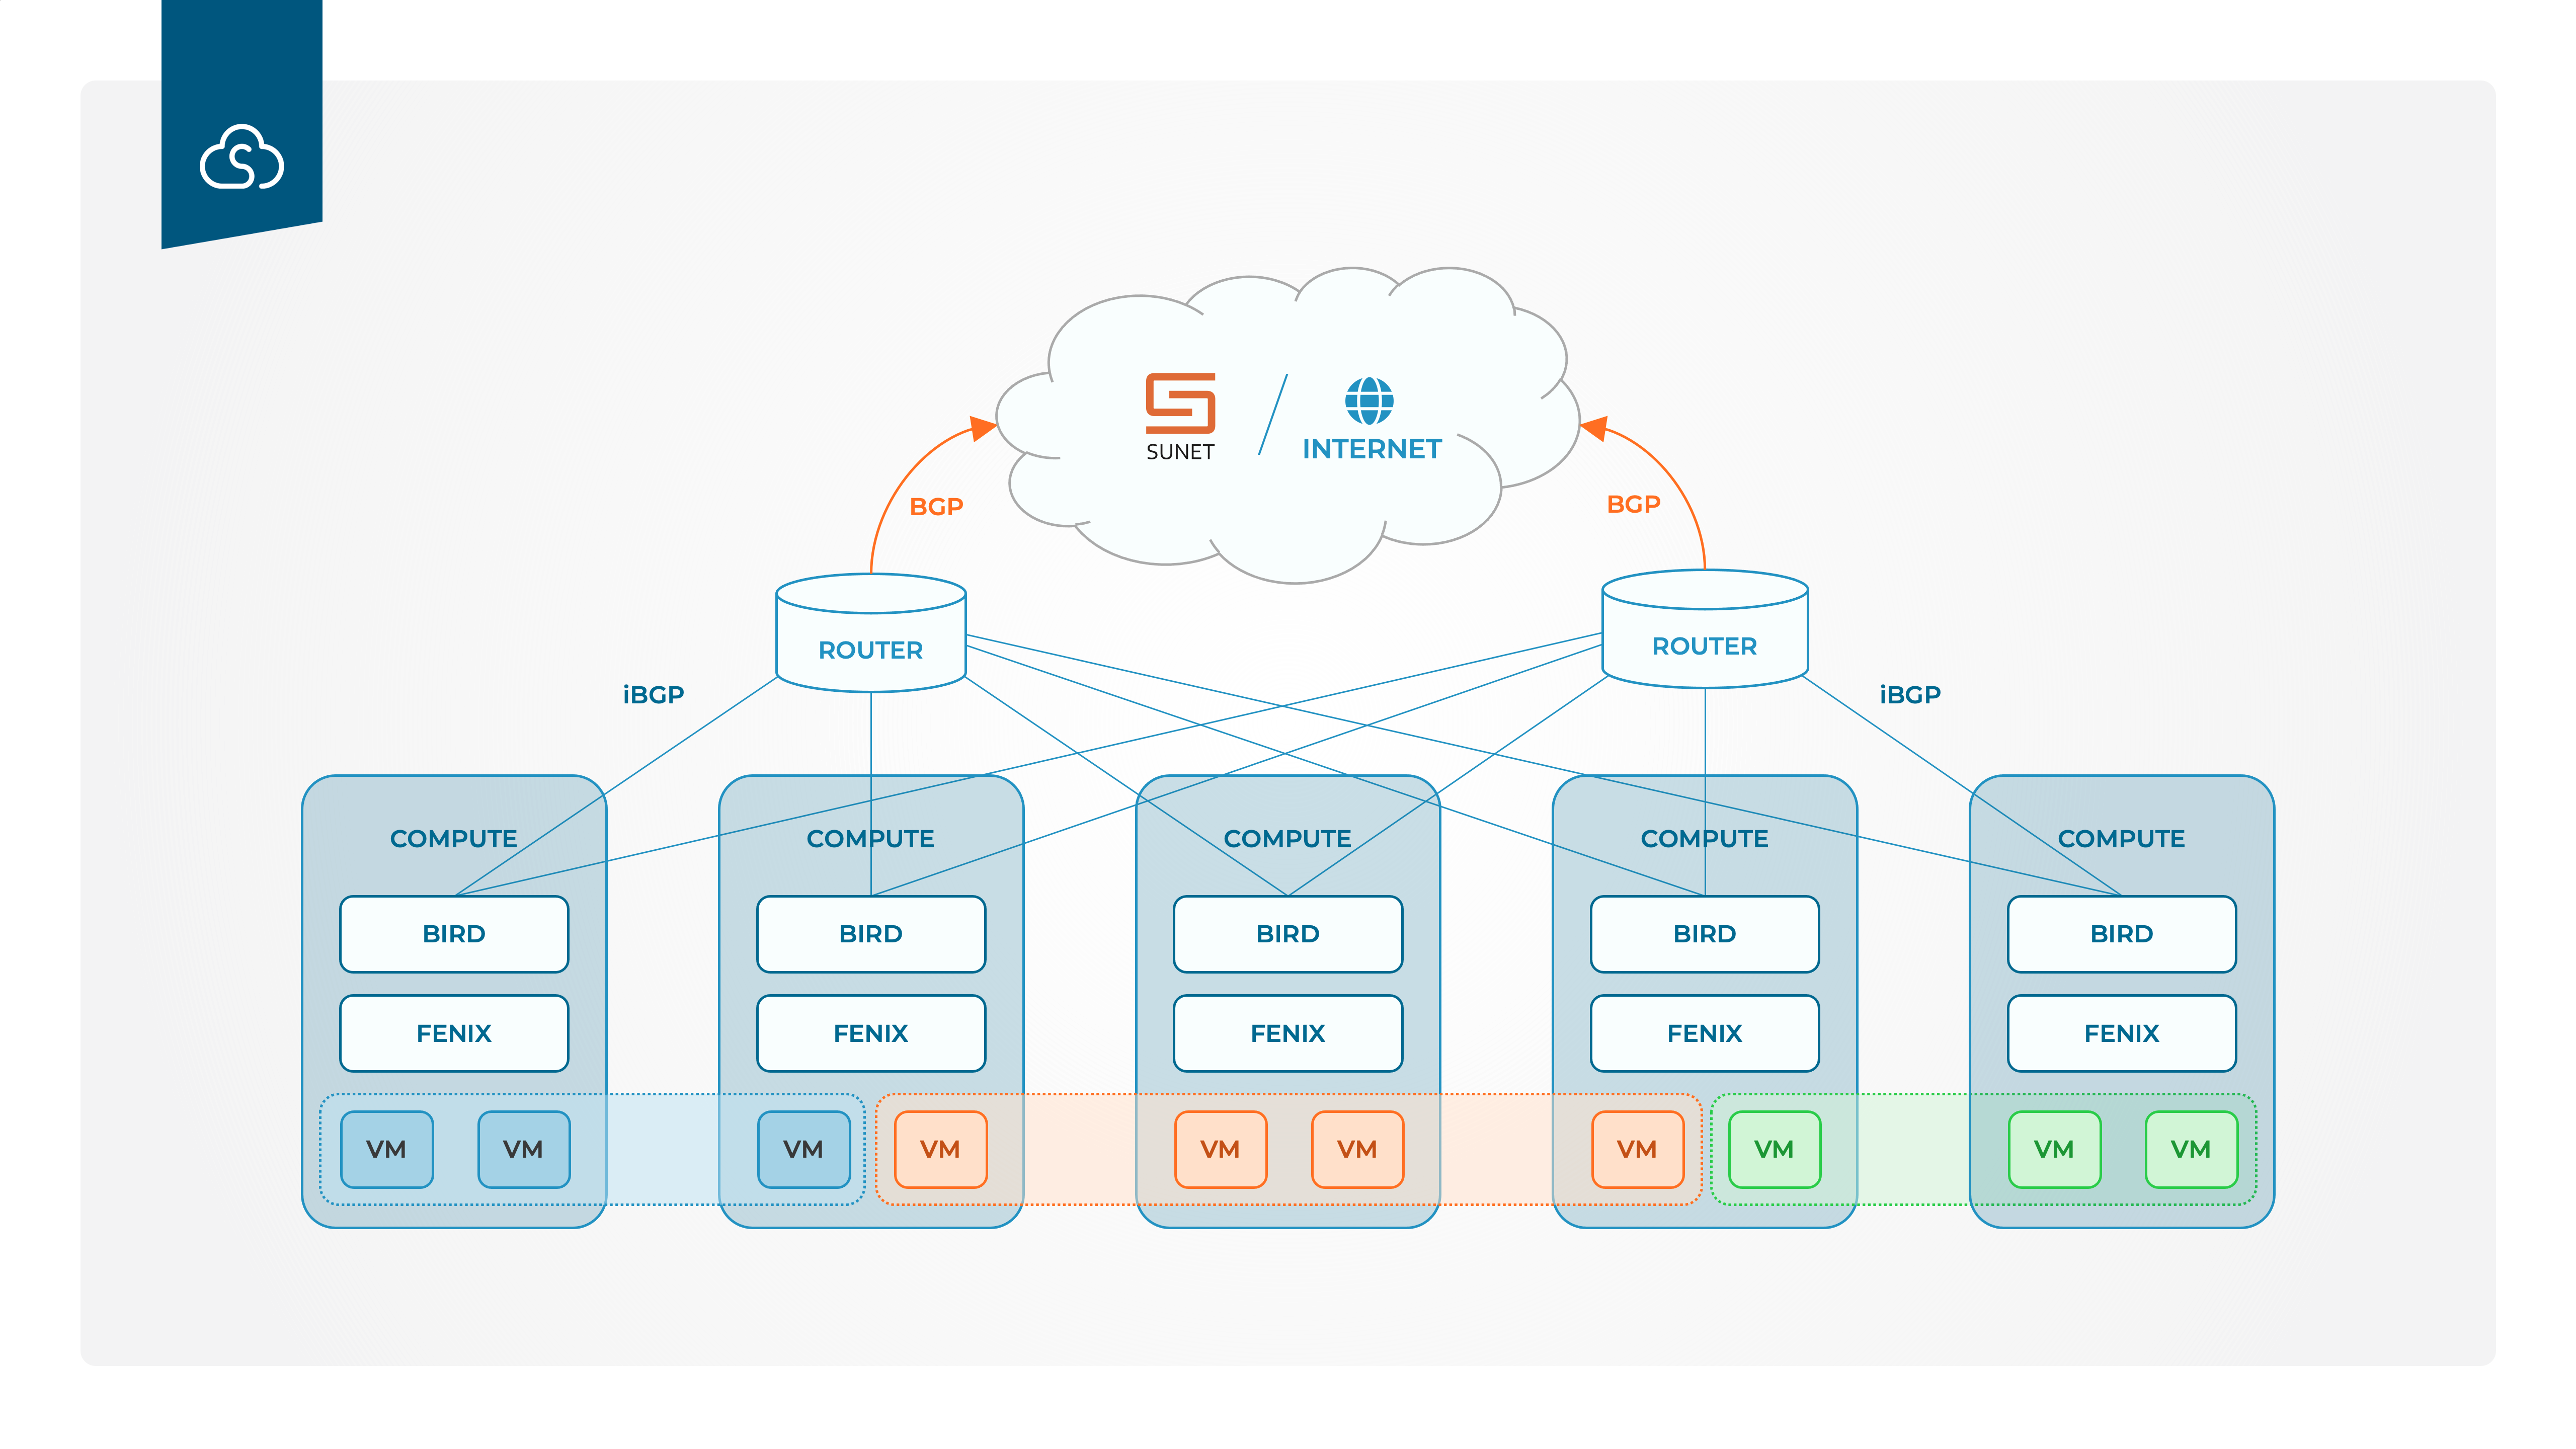
All the compute nodes are responsible for the routing to and from the instances running on them and the information on where the different instances can be reached is communicated with BGP. All compute nodes announce which IP-addresses (instances) that are running to them with the routing daemon BIRD. FENIX, also running on all the compute nodes, is responsible for the firewall configuration on all the compute nodes to ensure that only instances belonging to the same project can reach each other. Since no layer 2 is available it is not possible to create own networks in the platform. Instead each instance has an interface in one or more of the following:
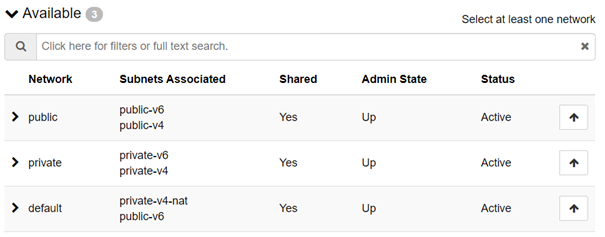
The network “private” means that the instance will get a private IPv4 and IPv6 address with no way of reaching the internet on that interface since there is no NAT-functionality enabled. This network is typically used for backend traffic which never should go over the Internet. “Default” will give you one private IPv4 address and one public IPv6. The private IPv4 also has dynamic NAT enabled which makes it possible to reach the Internet from the inside but not for anything to reach the instance from the outside. This could be handy if you install an overlay network agent (see more about Zerotier below) since the tunnel will be initiated from the instance so you will be able to reach the instance through the tunnel but it will still be safeguarded from traffic from the outside. “Public” will give you one public IPv4 address and IPv6 address. This network is used for instances that should be reached from the instances such as frontends and jump hosts. The addresses in all the networks are given with DHCP and all the networks are using a shared pool of IP-addresses. Even though an DHCP is used and instance will never change IP-address as long as it is not deleted.
Rescuing instances
There is a "Rescue Instance" feature in the drop-down menu on the instance in the instance listing, which makes it possible to put the instance in rescue mode. The user picks an image to boot from (could be any image that you feel familiar with) and then the instance will be rebooted with the original root file system mounted as a secondary volume. You can now run fsck or other operations on the root fs in order to repair the filesystem. Once you are done, pick "Unrescue Instance" in the drop-down menu and the instance will be rebooted with the mended root file system.