Migrate from legacy platform
Migrating from the legacy platform is imperative for all customers who want to continue using Safespring's services as the legacy platform is no longer supported from April 1 2023, and will be shut down on May 1 2023.
For most customers the migration is a simple process but there are some things to consider before beginning.
A few notes before you begin
-
Migrating a volume from the legacy platform to the new platform is like taking out a hard drive from physical computer and shipping it to a new data center.
-
The computer, network, and firewall (security groups) do not follow the hard drive. You need to create these in the new platform.
-
Same goes for any other resources you may have in the legacy platform, including images, snapshots, SSH keys etc.
-
IP ranges will differ in the new platform. DNS records that point to IP addresses in the legacy platform need to be recreated. Additionally, any configuration dependent on the legacy network needs to be changed before migrating.
-
The network model in the new platform is different from the legacy platform. See our docs for more info on that.
-
Any dependencies between resources in the legacy platform need to be resolved before migration. For example, if you have multiple volumes attached to your instances, you will need to migrate these volumes separately and then attach them in the new platform.
-
If an instance is dependent on a service running on another instance in the legacy platform, it needs to be made available over the internet or migrated to the new platform. There is no internal routing between networks in the legacy platform and the new platform.
-
The volume may need preparations depending on the operating system such as the Sysprep tool for Windows.
Choosing your method
Moving instances between clouds comes with a few caveats. Ideally, you would build the instance in the new cloud and then migrate the data you need from the old, using the the opportunity to clean up and start fresh. This is the method we recommend whenever possible.
However, if you cannot do this, Safespring has developed a method for migrating volumes from the legacy platform to our current platform. This guide describes what the user needs to do in order to use the method.
Determine which boot source and flavor you're using in the legacy platform
The preparations will differ depending on which kind of flavor or storage the instance in the legacy platform is using:
- The instance is using a local disk flavor and boots from an image source.
- The instance is using a central storage flavor and boots from an image source.
- The instance is using a central storage flavor and boots from a volume.
Local flavors are prefixed with lb- or lm. Central storage flavors are
prefixed with b- or m-.
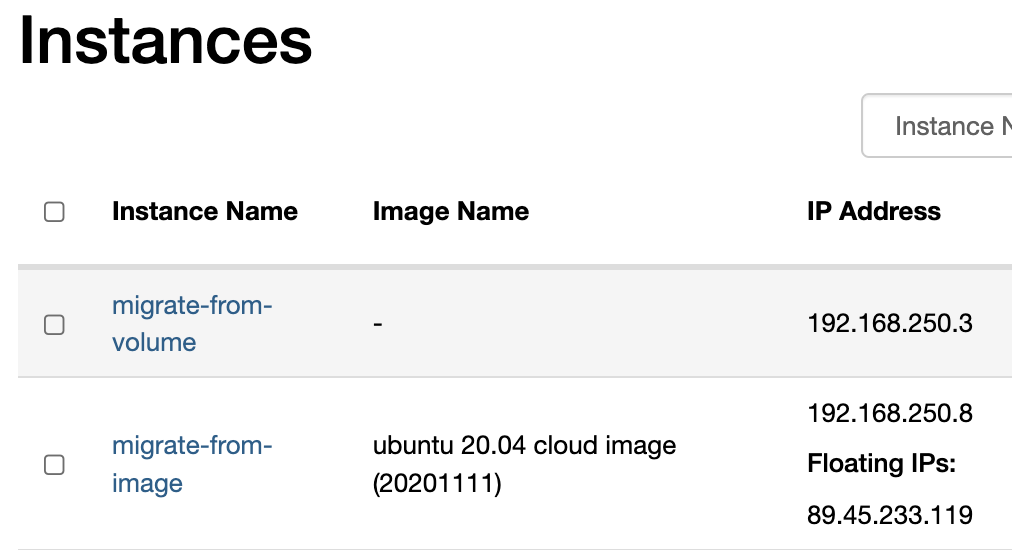
You can tell if you instance is booting from image source by looking in the "Image Name" column of the instance. If you see a minus sign there, the instance is booting from volume and belong to category 3 above. If you see an image name there, it belongs to category 1 or 2 depending on the flavor.
Determine which flavor you will be using in the new platform
Chances are, even though you are migrating from a local flavor, you will want a central flavor in the new platform. Local flavors have slightly higher performance but do not have any redundancy. This means that if the host fails, your data as gone. Therefore, we only recommend using local flavors for stateless workloads where data loss is acceptable. Central flavors offers a slightly lower performance but will meet the needs of most customers, with the added benefit of redundancy and flexibility such as zero downtime during maintenance etc.
You can read more about our flavors here
Initial preparations
In order to migrate, please make sure: - You have access to the project you're migrating from in the legacy platform - You have a user account in the new platform - That the project you're migrating to has been created in the new platform - That you have access to the project you're migrating to in the new platform
If not, please contact support(at)safespring.com and we will help you out.
You will also need the project ID for the project you're migrating to. You can find this by simply clicking on Identity - Projects and copy the Project ID next to the project name.
Migrating from a central flavor with volume boot source
This is the simplest case in which you can migrate the volume directly to the new platform.
- In the legacy platform, shut off the instance from the operating system or in the dashboard.
- Under Compute - Volumes, select "Create Snapshot" from the Actions menu
- Under "Description" type in
migrate_to=<project-id of project in v2>. This will tag the volume and will be picked up automatically by our migration tooling. - Wait for migration to complete (usually around 15 minutes but may take up to a few hours in some cases)
- Once the migration is complete, you will see the volume in the new platform under Compute - Volumes. To make sure that the volume is ready to use, choose "Update metadata" from the Actions menu and check that you have migrate_status=volume_synced under "Existing Metadata". Also make sure that the volume is bootable
- Create a new instance and select Volume under Select Boot Source. Please make
sure that you select the correct volume and a central flavor type prefixed
with
b2matching the resource needs of the instance. - After the instance has been created make sure that it boots correctly and that you can access it via SSH or the console. Also attach secondary volumes that you might have migrated using the same method.
- After a couple of days of running in the new instance, don't forget to remove the old instance, including the created volume snapshot and volume in the legacy platform.
Migrating from a central flavor with image boot source
As we only facilitate the migration of volumes, you will need to create a snapshot of the instance and convert this to a volume if you have an image boot source. This is a simple process but involves a few extra steps.
- In the legacy platform, shut off the instance from the operating system or in the dashboard.
- Under Instances in the Compute side menu, select "Create Snapshot" from the Actions menu.
- Under Images in the Compute side menu, find the image you created and select "Create Volume" from the Actions menu. Choose "fast" as the type. This shouldn't take too long but please be patient if it doesn't complete immediately.
After this, you can follow the steps in the previous section to migrate the volume. Although it it possible to create an image from the volume after you've migrated to the new platform, there no real benefit of doing so as the image service and the volume service runs on the same backend. If you still want an image instead of a volume you can follow the steps under "Converting the volume to an image for use with a local flavor", ignoring steps that applies to local disk.
Migrating from a local flavor
If you are migrating from a local flavor, the process is slightly more complex but should be pretty straight forward if you follow the steps below.
Migrating the ephemeral disk
- Determine if you need the ephemeral disk or not. If you do, you will need to create a new volume of at least the same size as the ephemeral disk and attach it to the instance. If you don't, you can skip to the next headline.
- Determine if you need to copy the data on the ephemeral disk or if you need to clone the entire filesystem as it is.
- If you only need the data, create a new filesystem on the volume device, mount it and use rsync or similar to copy the data from the ephemeral disk to the new volume.
- If you need to clone the entire filesystem, unmount the ephemeral disk and
use dd to clone the entire filesystem to the volume device, e.g.
dd if=/dev/sdb of=/dev/sdc --progresswhere/dev/sdbis the ephemeral disk and/dev/sdcis the volume device. If you're not sure or not comfortable with running these commands, please contact support and we will help you out. - When done, detach the volume from the instance.
- Under Compute - Volumes, select "Create Snapshot" from the Actions menu
- Under "Description" type in
migrate_to=<project-id of project in v2>. This will tag the volume and will be picked up automatically by our migration tooling. - Wait for migration to complete (usually around 15 minutes but may take up to a few hours)
- Once the migration is complete, you will see the volume in the new platform under Compute - Volumes. To make sure that the volume is ready to use, choose "Update metadata" from the Actions menu and check that you have migrate_status=volume_synced under "Existing Metadata".
- You can leave this for now and continue with the next step.
Migrating the root disk
- In the legacy platform, shut off the instance from the operating system or in the dashboard.
- Under Instances in the Compute side menu, select "Create Snapshot" from the Actions menu. This will take some time to complete so please be patient.
- Under Images in the Compute side menu, find the image you created and select "Create Volume" from the Actions menu. Choose "fast" as type if you plan to boot from the volume. If you're planning to use a local disk in the new platform it doesn't matter. This shouldn't take too long but please be patient if it doesn't complete immediately.
- Under Volumes in the Compute side menu, find the volume you created and select "Create Snapshot" from the Actions menu.
- Under "Description" type in
migrate_to=<project-id of project in v2>. This will tag the volume and will be picked up automatically by our migration tooling. - Wait for migration to complete (usually around 15 minutes but may take up to a few hours)
- Once the migration is complete, you will see the volume in the new platform under Compute - Volumes. To make sure that the volume is ready to use, choose "Update metadata" from the Actions menu and check that you have migrate_status=volume_synced under "Existing Metadata".
Boot from volume
If you plan to boot from the volume, you can now create a new instance and follow steps 6-8 under "Migration from a central flavor" above.
Converting the volume to an image for use with a local flavor
If you plan to use a local flavor, you will need to convert the volume to an image, create a new instance with a local flavor and select the image as source.
- In the new platform, under Volumes in the Compute side menu, find the volume you created and select "Upload to Image" from the Actions menu.
- Choose QCOW2 as Disk Format and give the image a name.
- Create a new instance and select Image under Select Boot Source. Please make
sure that you select the correct image and a local flavor type prefixed with
l2matching the resource needs of the instance. - After the instance has been created make sure that it boots correctly and that you can access it via SSH or the console. Also attach the volume where you migrated the ephemeral disk to, if you did so.
- Decide if you want to keep the ephemeral disk on a volume or copy the content to the root disk.
- If you want to keep the ephemeral disk on a volume, simply add the device to
/etc/fstaband mount it. If you want to copy the content to the root disk, use rsync or similar to copy the data from the ephemeral disk to the root disk. Then unmount the ephemeral disk, detach the volume and delete it to avoid any extra costs. - After a couple of days of running in the new instance, don't forget to remove the old instance, including the created volume snapshot and volume in the legacy platform. Also remember to delete the excess volume you used to create the image with.
How to set the metadata tag for migration using the CLI
If you prefer to use the CLI instead of Horizon, you can use the following command to set the metadata tag for migration:
openstack --insecure volume snapshot set --property 'migrate_to=<project id>' <volume snapshot>
CLI commands to create create a volume from snapshot
To automate the creation of the volume snapshot from an instance booting from image, you can run the following commands after you have created the snapshot of the instance in Horizon:
(cli): openstack --insecure image list --private
(cli): openstack --insecure volume create --image <image_id> --size <size> <vol-name>
(cli): openstack --insecure volume snapshot create --volume <volume_id> --property migrate_to=<v2_project_id>