Portal overview
I just got a Safespring Portal account, what now?
As the first user for your domain you should have received three activation emails:
- The portal URL: https://portal.safespring.com
- IDM in sto2 URL: https://sto2.idm.paas.safedc.net/
- IDM in osl2 URL: https://osl2.idm.paas.safedc.net/
You should click the activation links in each and every one of the emails to ensure that you have all accounts you need in order to provision your services.
Prerequisites
Before you begin working with your Safespring Portal clusters, you need to have the following tools installed:
- kubectl - The Kubernetes command-line tool. See Install and Set Up kubectl
- kubelogin - A kubectl plugin for OIDC authentication. This is required to authenticate to your clusters. See the kubelogin setup guide for installation instructions.
Logging into the portal
You are now ready to go to https://portal.safespring.com:

You click the "Sign in" button and you see this:

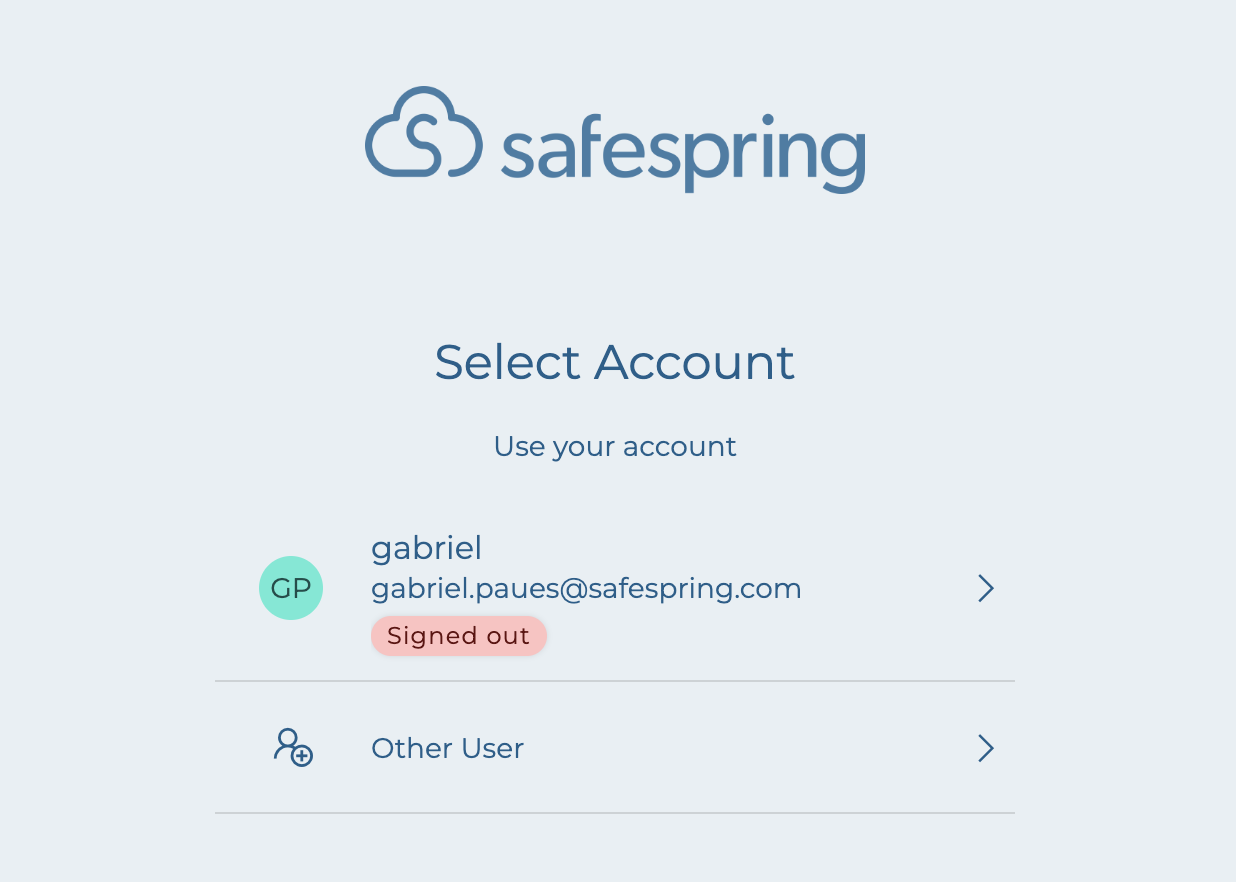
You click the "Continue with ZITADEL" and log in.
Viewing your environments
Once you have logged in you will be greeted with your "Environments Overview". If this is the first time you login that listing will be empty:
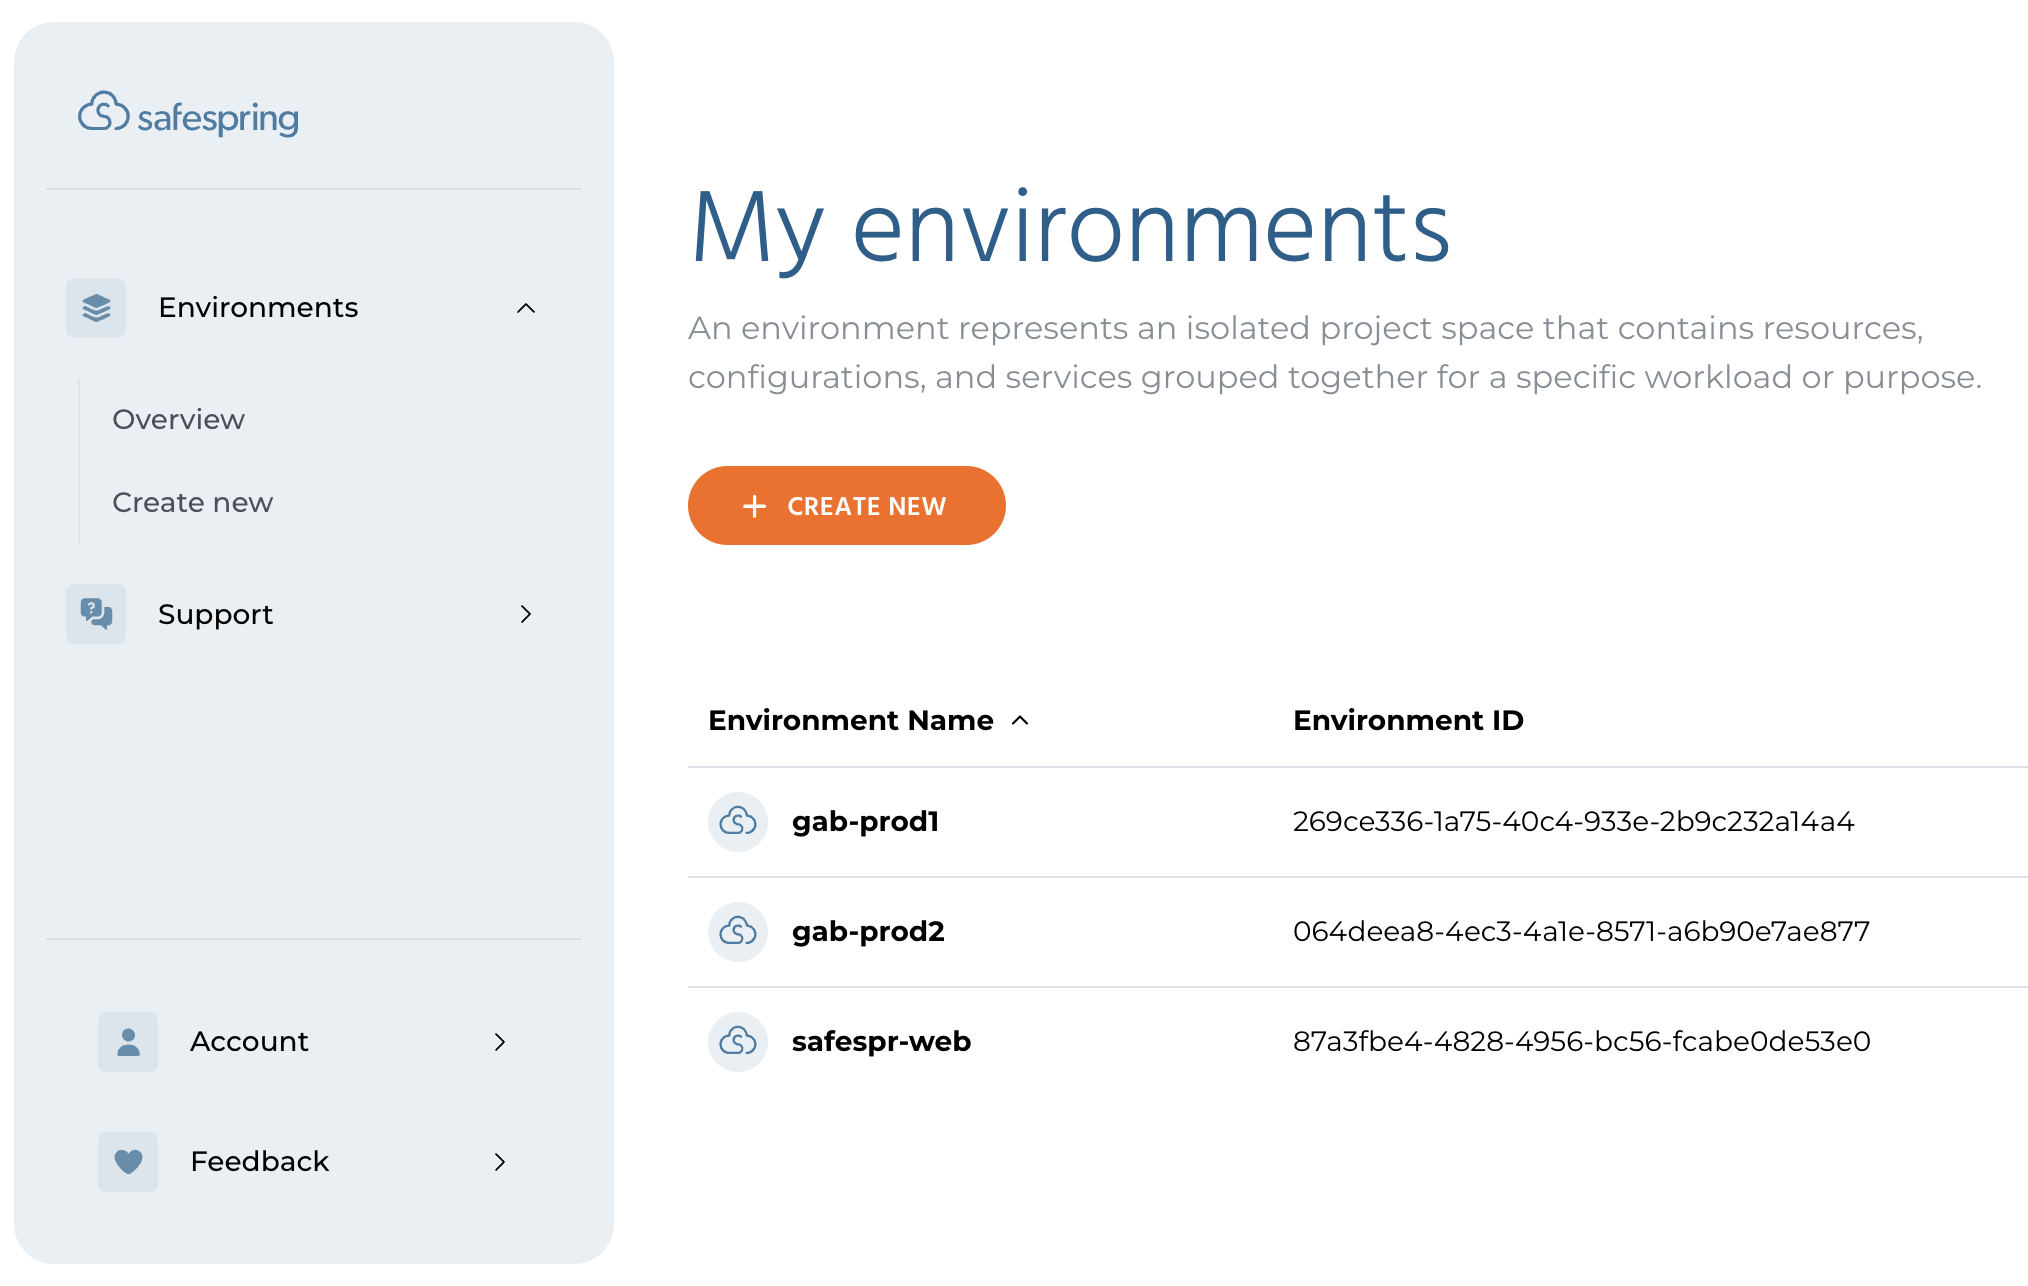 Environments is a way to group your resources into different separate environments in which you can run several clusters, compute projects or storage accounts.
You click "Create New" to create a new environment.
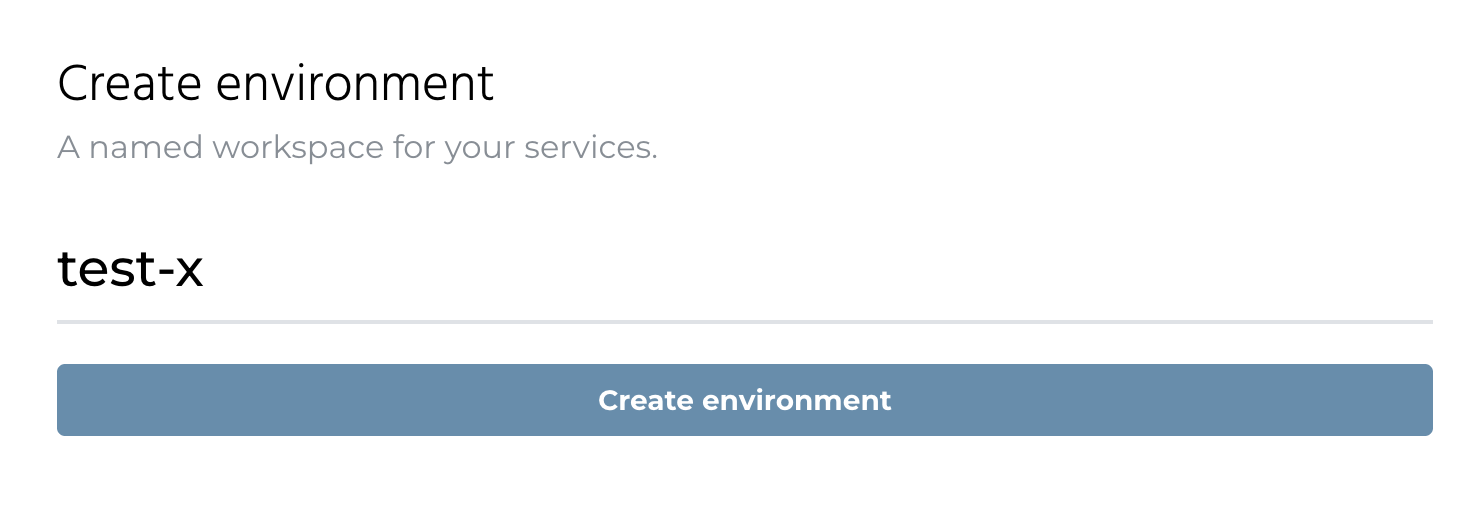
You give your environment a name and then click "Create environment".
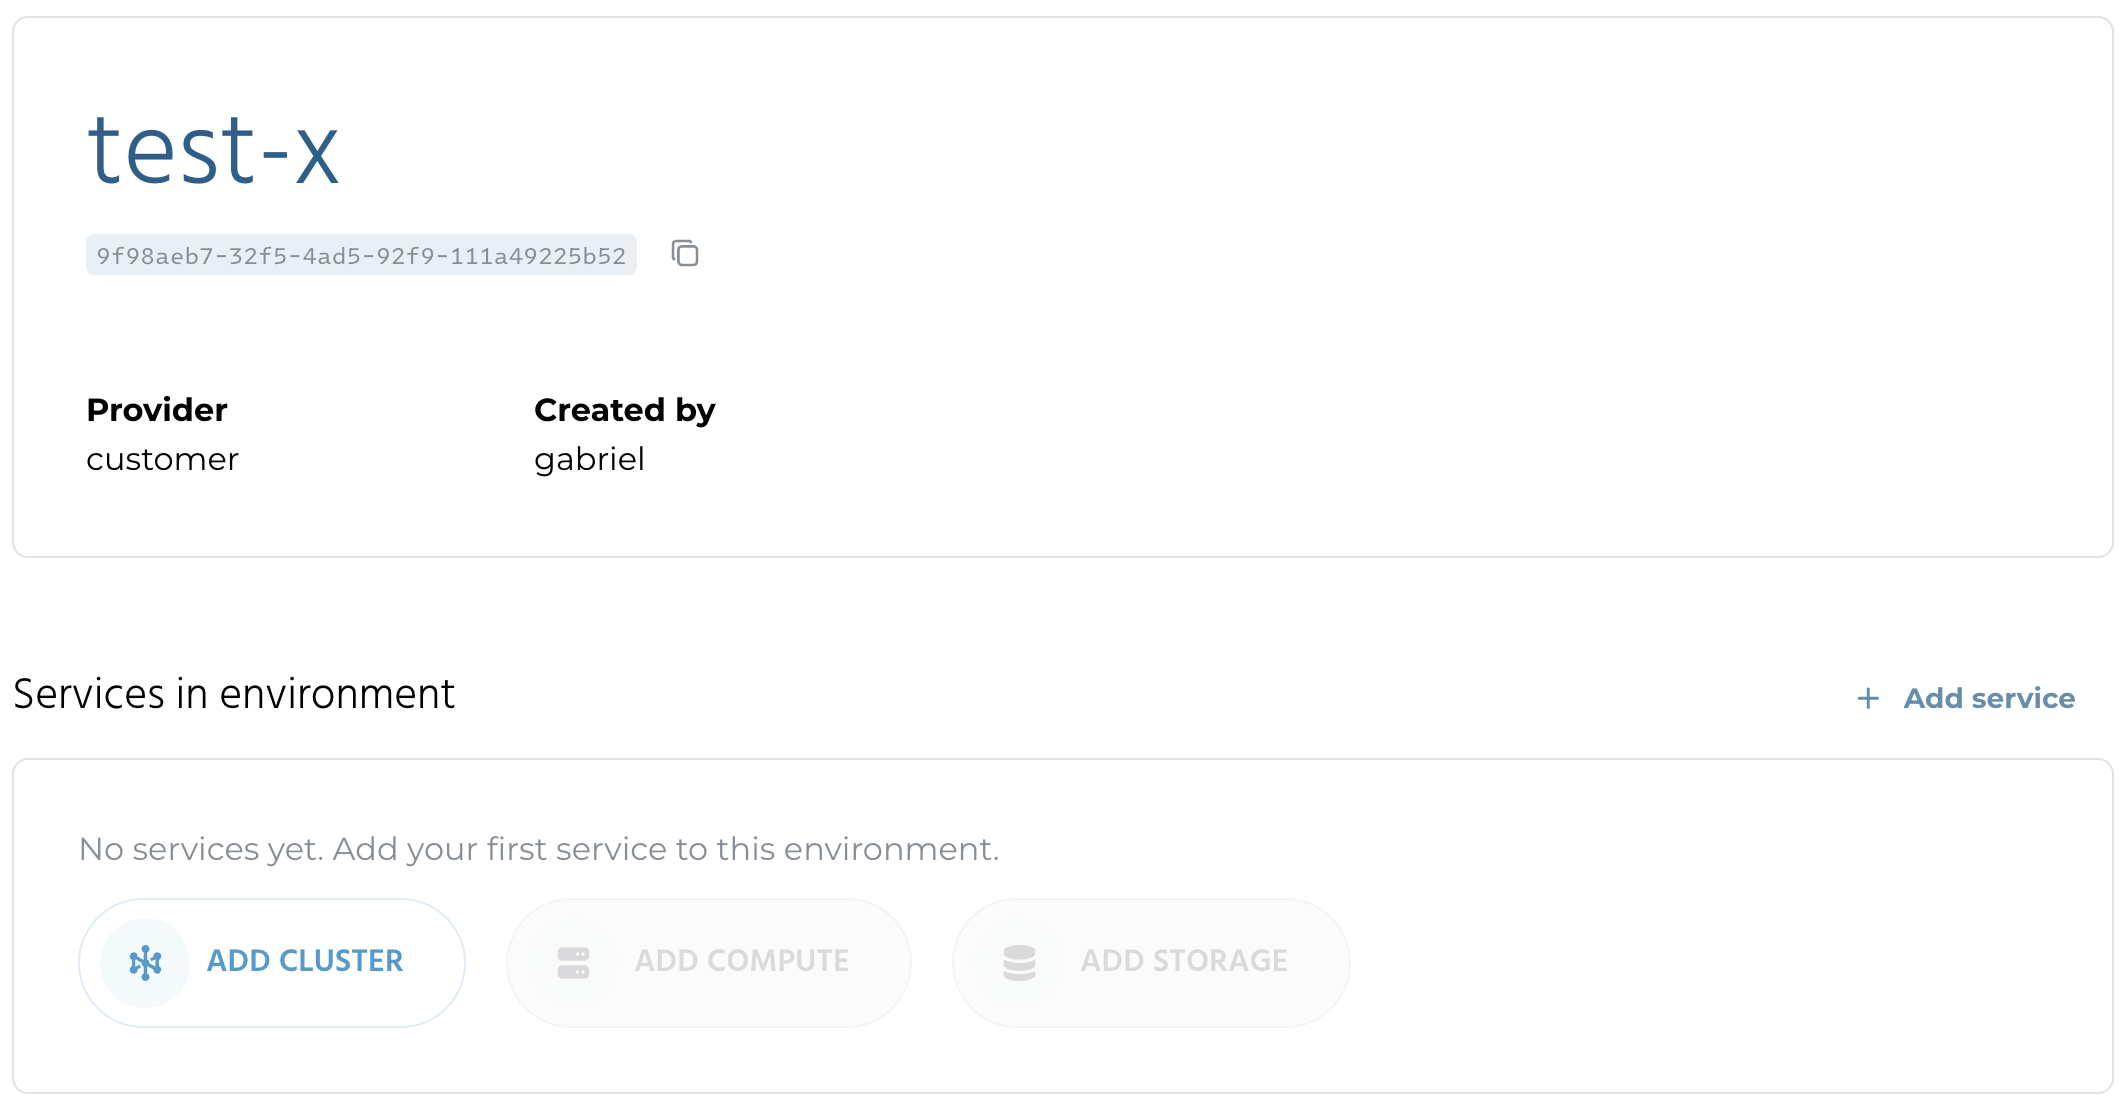 You now see your new environment, where you can start resources.
Create your first cluster
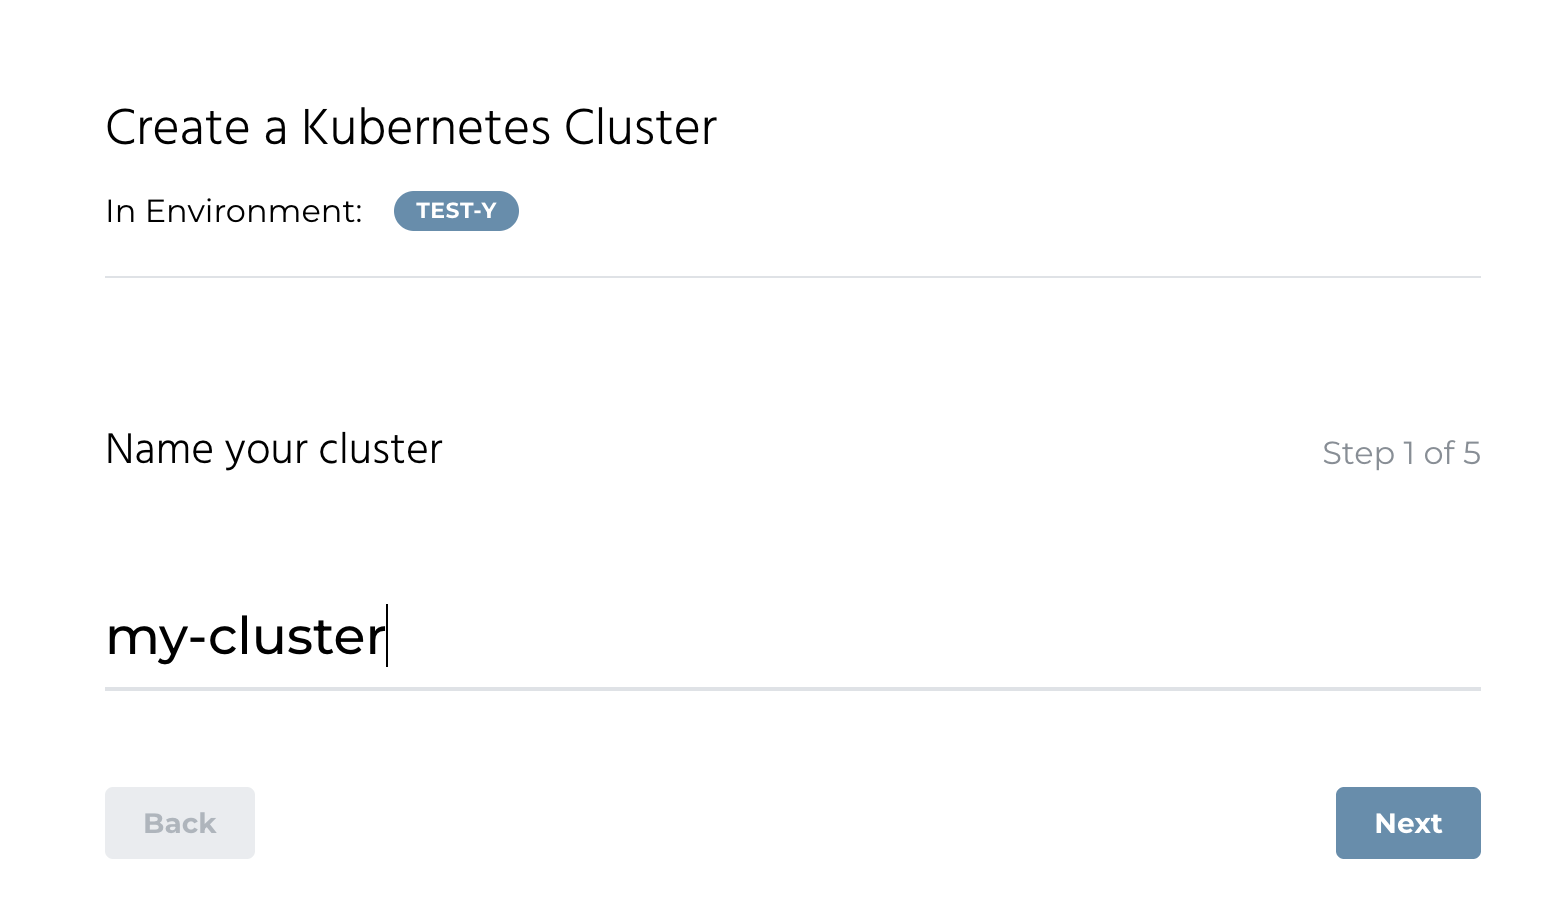
Click the button "Add Cluster" and give it a name:
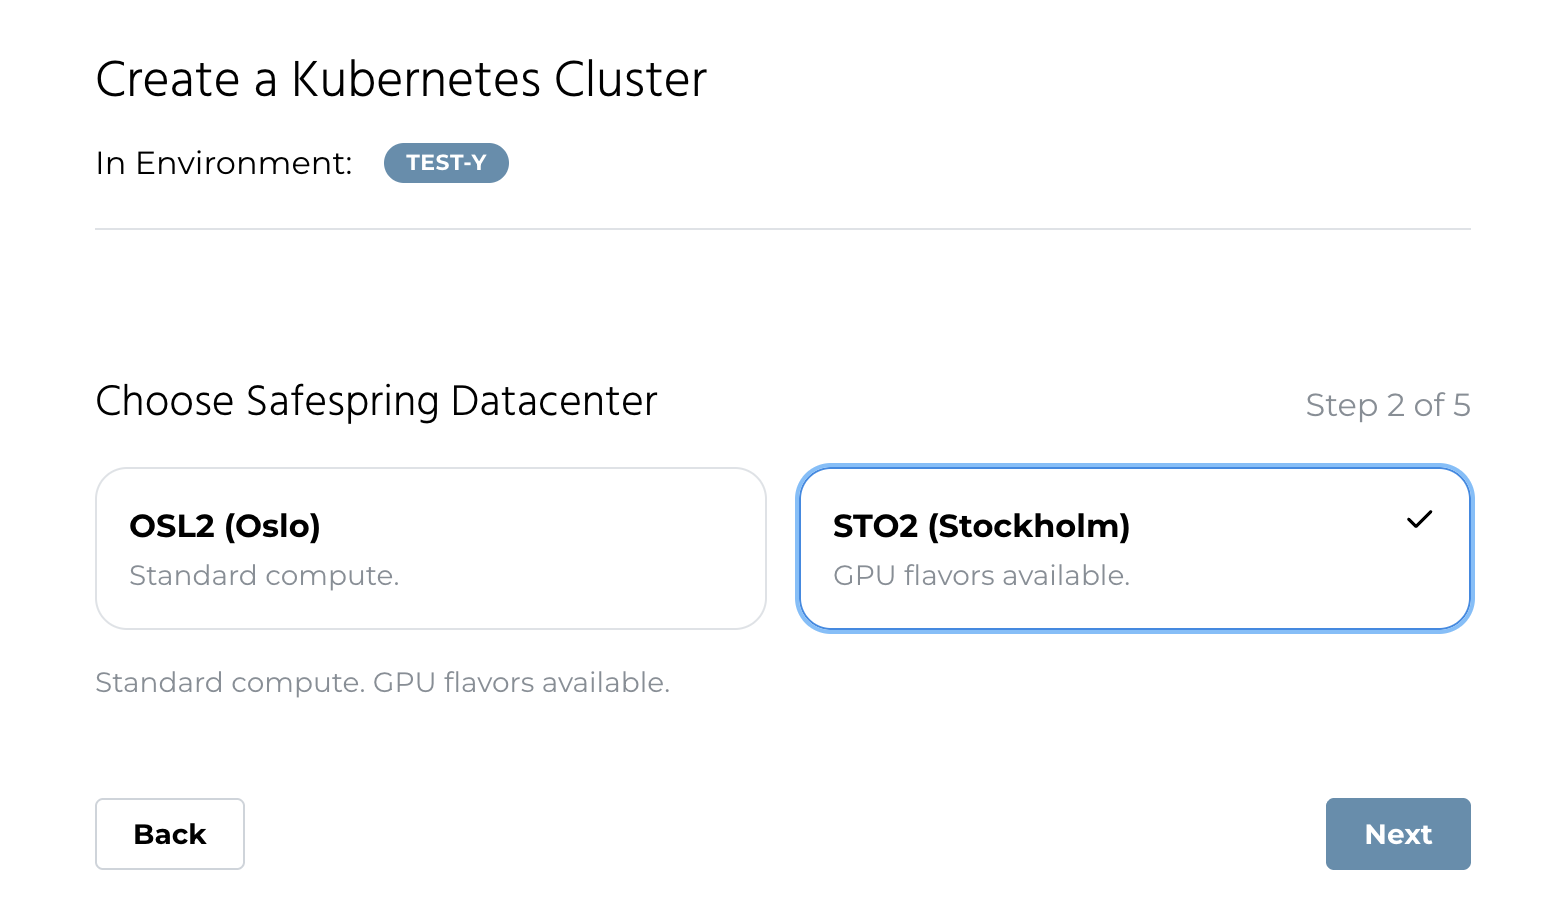
In the next step you pick which site you want to start your cluster in:
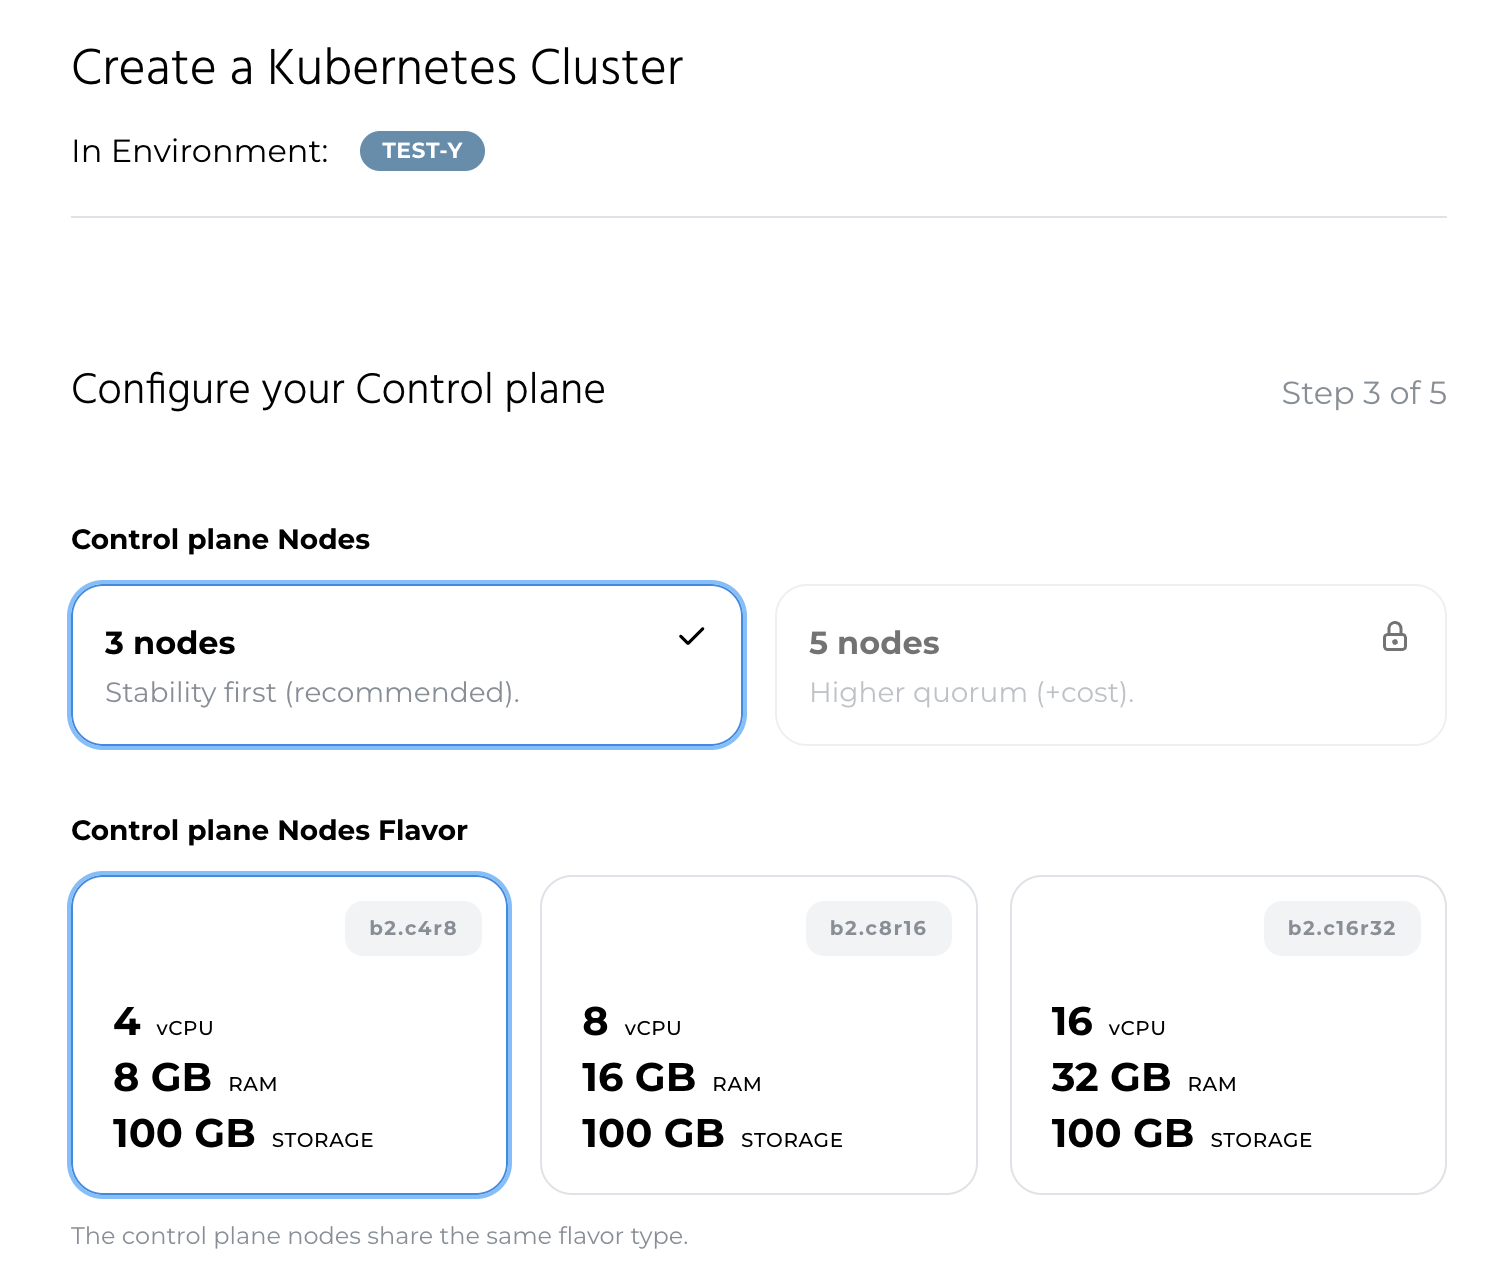
Now it is time to choose the specifications of the control nodes in the cluster:
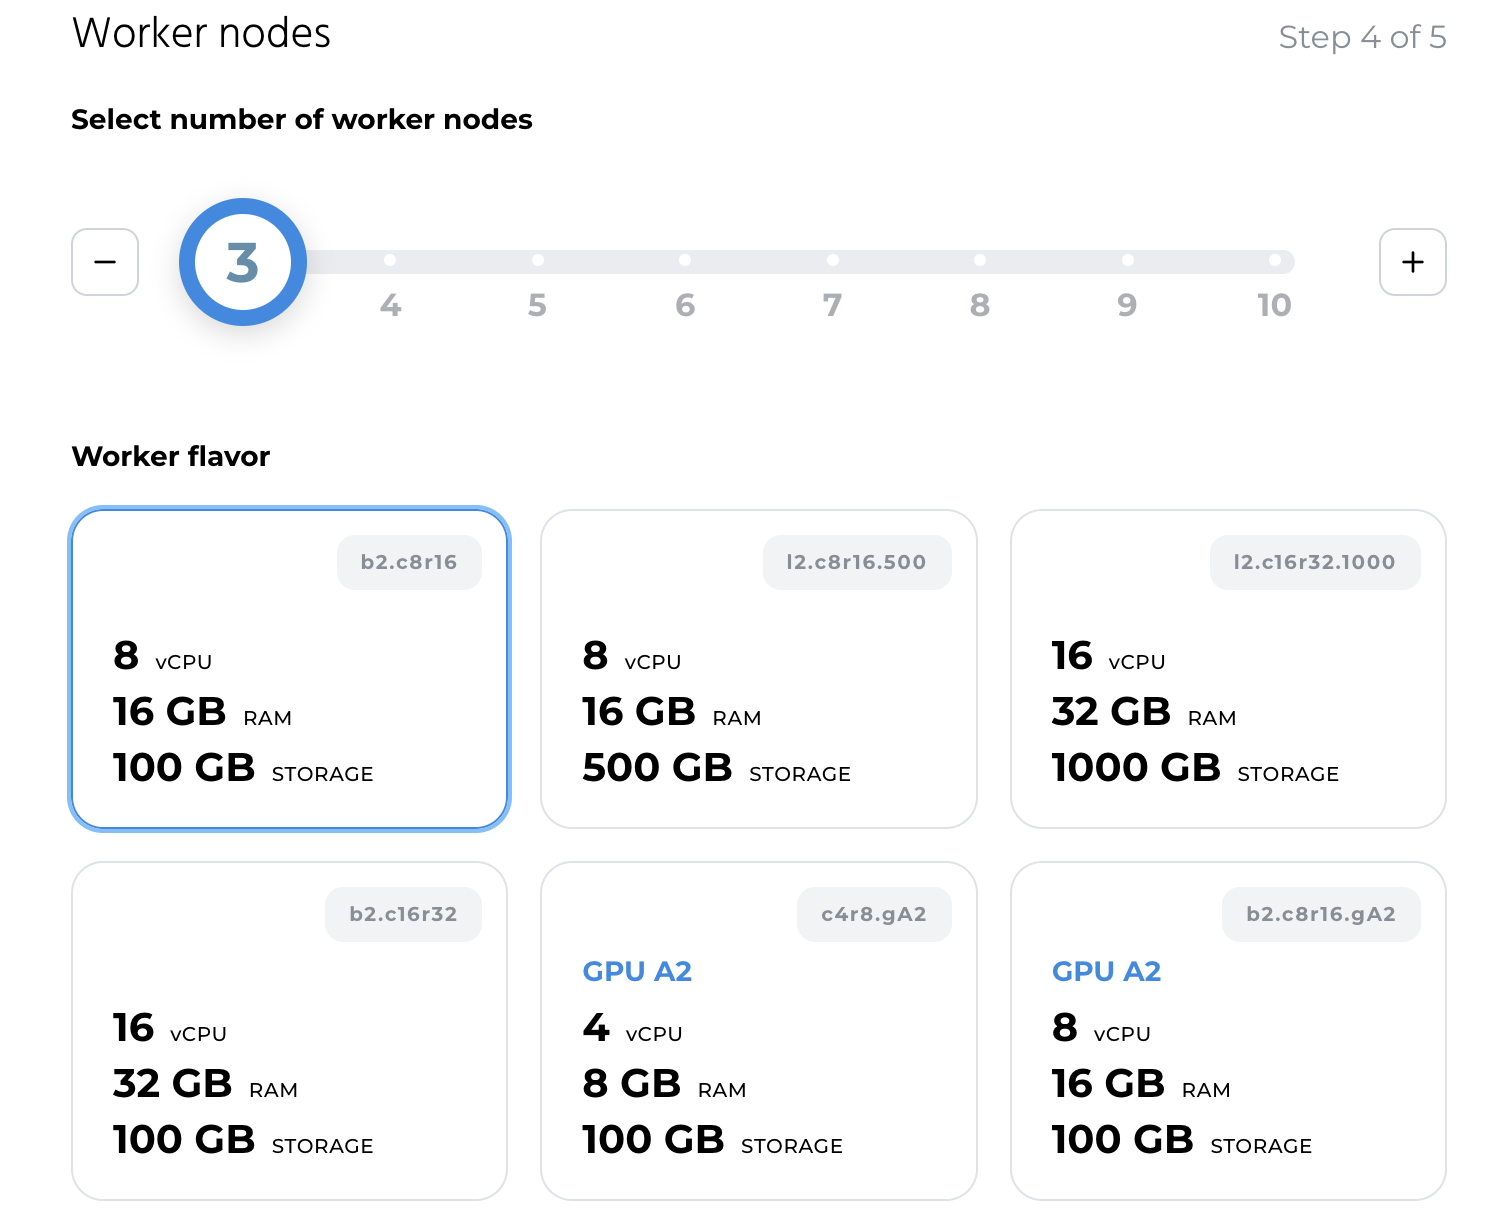
You can now choose how many worker nodes and how much resources each worker node should have:
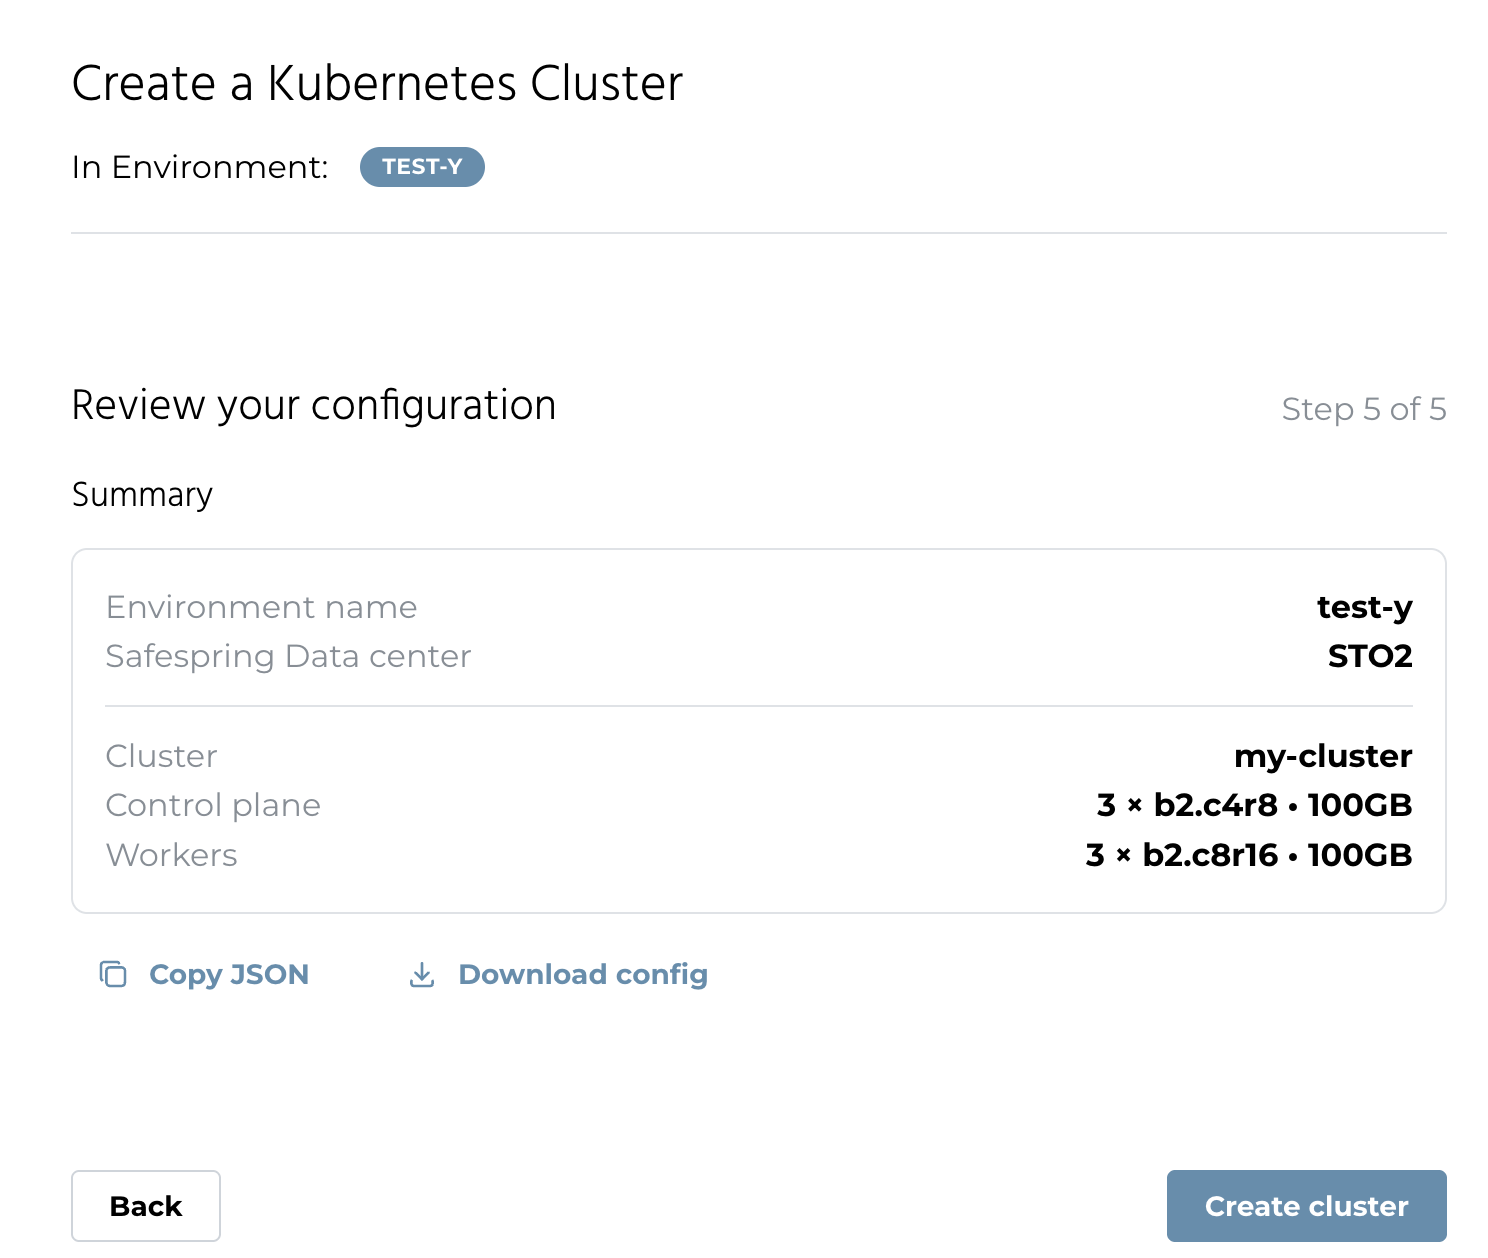
In the last step you review the cluster configuration for the cluster you are about to create. You can also download the cluster configuration JSON file for later reference:
Your cluster is now creating.
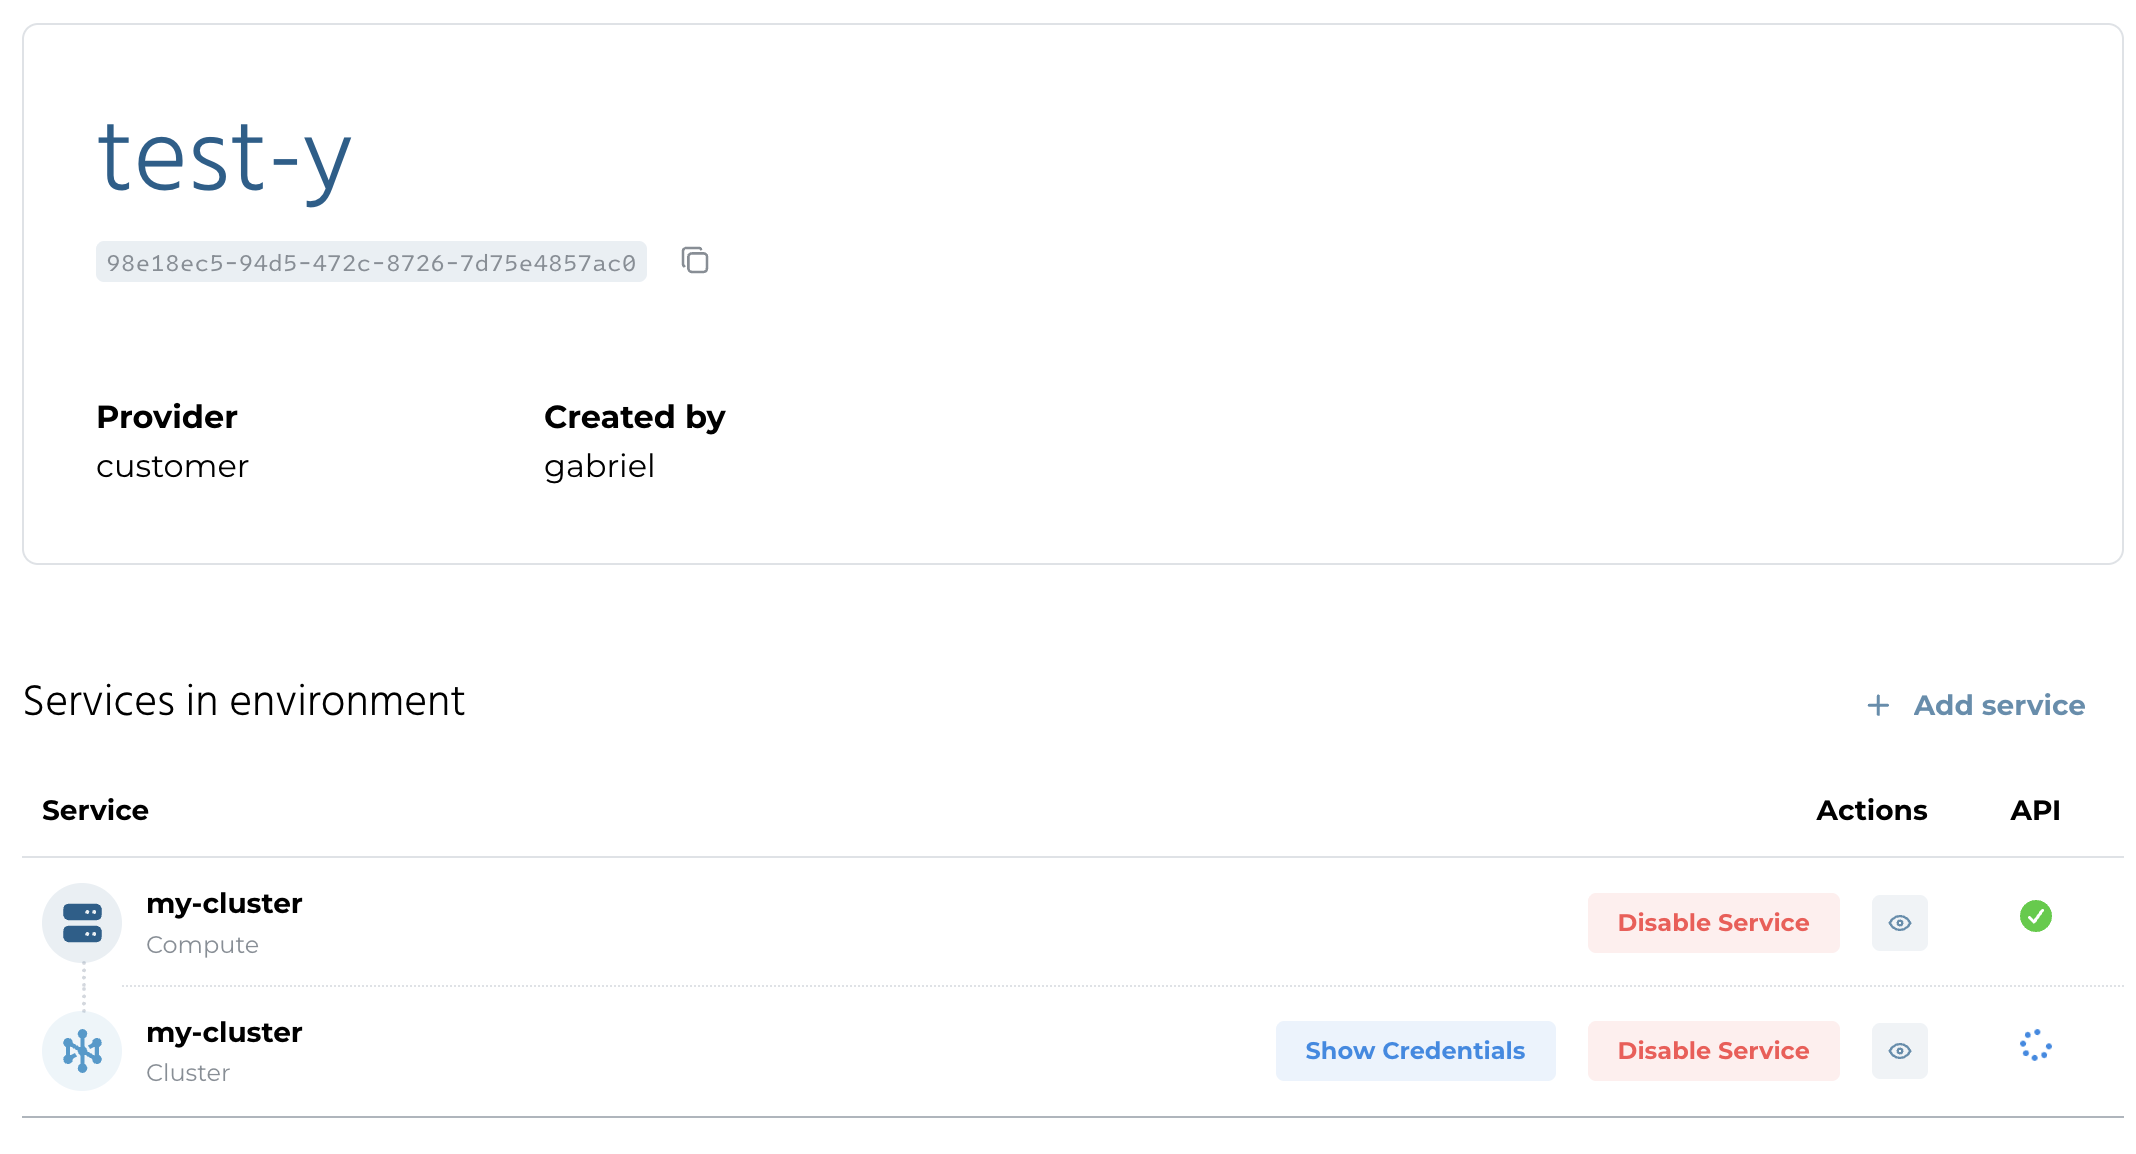
Accessing Kubernetes Cluster
Wait a few minutes and then click the Show Credentials button. If you get a kubeconfig file back your cluster is ready to use:

You can copy the file to a directory to a file named .kubeconfig in the environment where you have kubectl installed and run:
➜ export KUBECONFIG=$(pwd)/.kubeconfig
➜ kubectl get nodes
You will get redirected to the IDP of the data center where you provisioned your cluster:
You enter your password:

You will get a message that you have authenticated and if you go back to the terminal you will see the output of the command:
➜ kubectl get nodes
NAME                                     STATUS   ROLES           AGE     VERSION
my-cluster-control-plane-9pdn5           Ready    control-plane   8m35s   v1.33.5
my-cluster-control-plane-clrzd           Ready    control-plane   8m35s   v1.33.5
my-cluster-control-plane-rhx58           Ready    control-plane   8m17s   v1.33.5
my-cluster-vf9wj-md-worker-26bx9-fwlqn   Ready    worker          8m32s   v1.33.5
my-cluster-vf9wj-md-worker-26bx9-nf7x9   Ready    worker          8m31s   v1.33.5
my-cluster-vf9wj-md-worker-26bx9-qzjd2   Ready    worker          8m35s   v1.33.5
You can now start creating namespaces and start using your cluster.
For a graphical user interface for accessing the cluster please consult the Kubernetes Dashboard guide.