Getting Started
Prefer video?
Safespring has a series of video guides for Compute that walk through the most common tasks if you prefer to follow along visually.
Log in to the dashboard
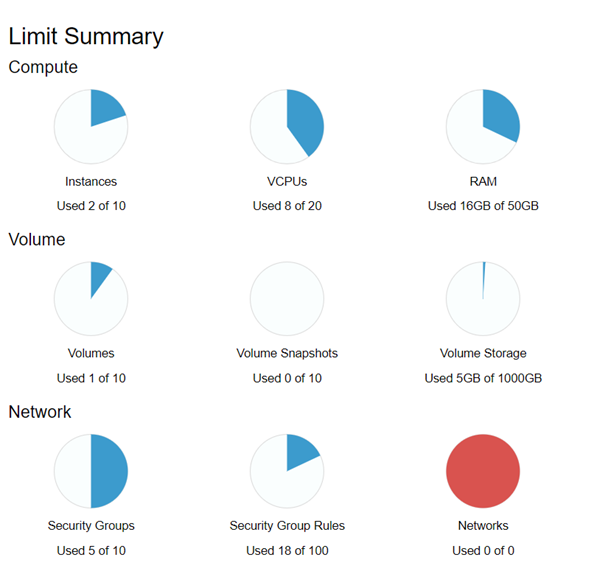
Go to the Horizon dashboard for your site and log in with your credentials. After login you land on the Overview page, which shows your current resource usage against your quota limits.
Safespring organizes resources into domains and projects. Each project is an isolated environment — a common setup is separate projects for test and production. See Sites and account structure for details.
Preparations
Before launching an instance, make sure you have an SSH key pair and a security group ready.
SSH key pair
A key pair is required to log in to your instance — password login is disabled on most images. If you do not have one yet, see the SSH key pairs how-to for instructions on generating a key and importing it into the dashboard.
To import an existing key, go to Compute → Key Pairs and click Import Public Key.
Security group
A security group controls inbound traffic to your instances. All inbound traffic is denied by default, so you need a security group that allows SSH (port 22) before you can connect.
Go to Network → Security Groups, click Create Security Group, give it a name (for example allow-ssh), and add a rule for SSH restricted to your IP address.
For detailed instructions, see Networking — Security groups.
Launch your first instance
In the left menu, go to Compute → Instances and click Launch Instance.
The wizard has several tabs — work through them in order.
Details
Give your instance a name.
Source
Set Select Boot Source to Image and pick an OS image from the list (for example Ubuntu 24.04).

Leave Create New Volume set to Yes and Delete Volume on Instance Delete to No — this gives you a persistent root disk that survives instance deletion. For a full explanation of boot storage options (ephemeral vs. volume-backed), see the Volume documentation.
Flavor
Pick a flavor that matches your workload. Flavors starting with b2 use central persistent storage and pair well with volume-backed boot. Flavors starting with l2 use fast local storage. See the Flavors documentation for a full breakdown.
Networks
Attach exactly one network:
| Network | Use case |
|---|---|
| public | Public IPv4 and IPv6, directly reachable from the internet |
| default | Private address with NAT for outbound internet access — not directly reachable from outside |
| private | Private address, no internet access |
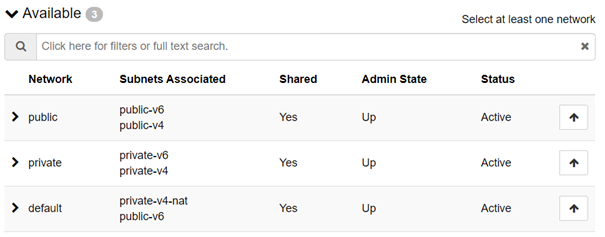
For your first instance, choose public. Instances on the default network have outbound internet access but cannot be reached directly from outside, so you will not be able to SSH in without first having a host on the public network to go through.
No routers, subnets, or floating IPs needed
Safespring uses Calico-based pure layer 3 networking. Unlike a standard OpenStack setup, you do not need to create virtual routers, configure subnets, or assign floating IPs — just attach one network and the instance is reachable at its assigned IP address straight away.
Attach exactly one network
Each network assigns a default gateway via DHCP. Attaching more than one causes conflicting gateways and unstable connectivity.
For a full description of the networking architecture, see the Networking documentation.
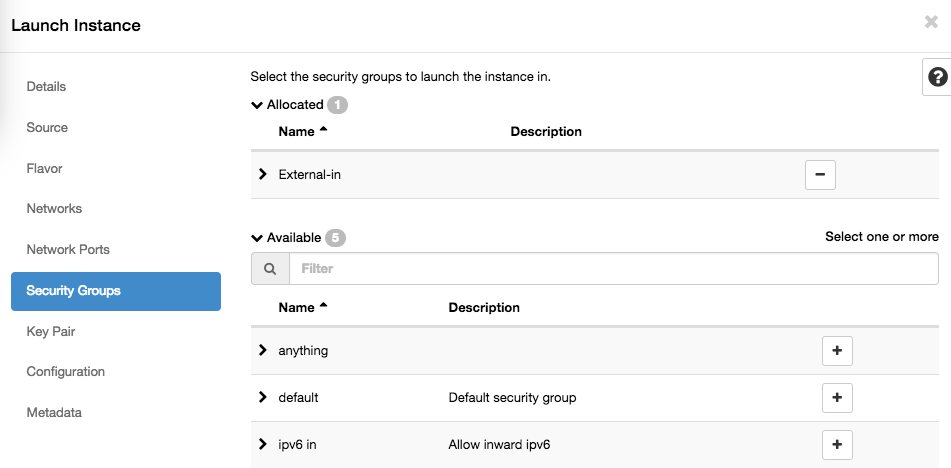
Security Groups
Select the security group you created in the preparations step.
Key Pair
Select the key pair you imported in the preparations step.
Configuration (Cloud-init)
Optionally, paste a cloud-init script in the Customization Script field to automate configuration at first boot — installing packages, creating users, or running scripts.
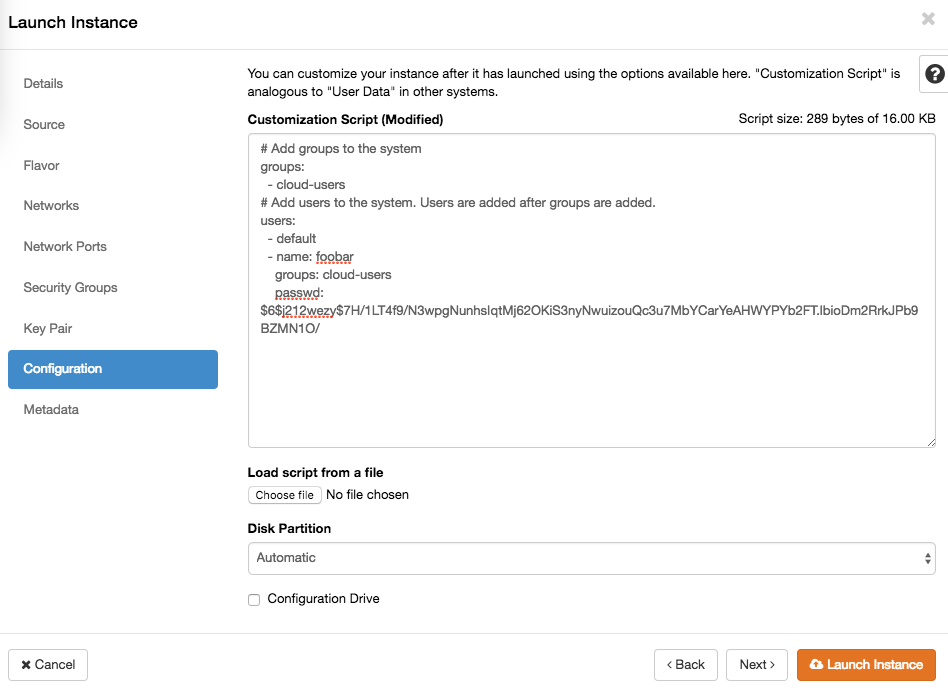
For ready-to-use examples, see the Cloud-init how-to.
Launch
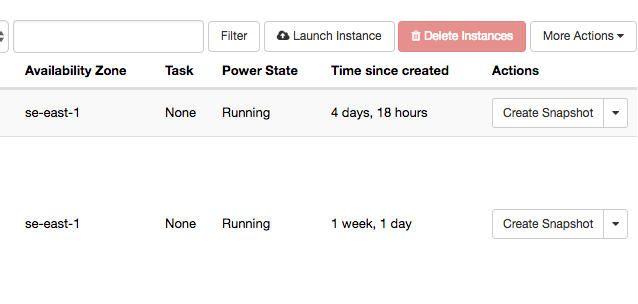
Click Launch Instance. The instance will appear in the instances list and reach Running status within a minute.
Connect to the instance
Connect via SSH using the default user for your image and the IP address shown in the instances list:
ssh <default-user>@<ip-address>
The default username depends on the image:
| Image | Default user |
|---|---|
| ubuntu-* | ubuntu |
| debian-* | debian |
| almalinux-* | almalinux |
| rocky-* | rocky |
| cirros | cirros |
Password login is disabled — the SSH key you selected during launch is used for authentication.
Next steps
- Volumes — boot storage options, attaching additional disks, and managing persistent storage: Volume documentation
- Networking — security groups, persistent IPs, and the full Calico layer 3 architecture: Networking documentation
- Cloud-init — automate instance configuration at first boot: Cloud-init how-to
- Flavors — full breakdown of flavor types and storage implications: Flavors documentation
- API access — manage instances with the OpenStack CLI or Terraform: API documentation
- Sites — available sites, dashboard URLs, and account structure: Sites documentation